How to easily write a website
OK, so hopefully I caught your eye with this catchy title. And I want to underline the word easily because this operation can be done in under 20 minutes, with a fully working website that you can show to others and boast about. 🤪
I also want to mention that this article is targeted at people that have zero knowledge of programming, and that want to have a webpage where they present their stuff like projects or ideas, write blog posts, or any kind of content that could benefit from being made public.
Also, for students that want to create their Curriculum Vitae and host it somewhere online, this is the article for you.
Finally, did I mention that it's totally free?!
Creating a GitHub Account
This one should be pretty straightforward. You go to the Signup Page of GitHub and create an account. They will ask you for your email and password, and finally, they will ask you to input a username. A good idea here is to use your name, written together or with a hyphen. For example, florintomozei or florin-tomozei. This is important, because later when we are going to create the repository for your website, we will use your username for its name.
Creating our first repository
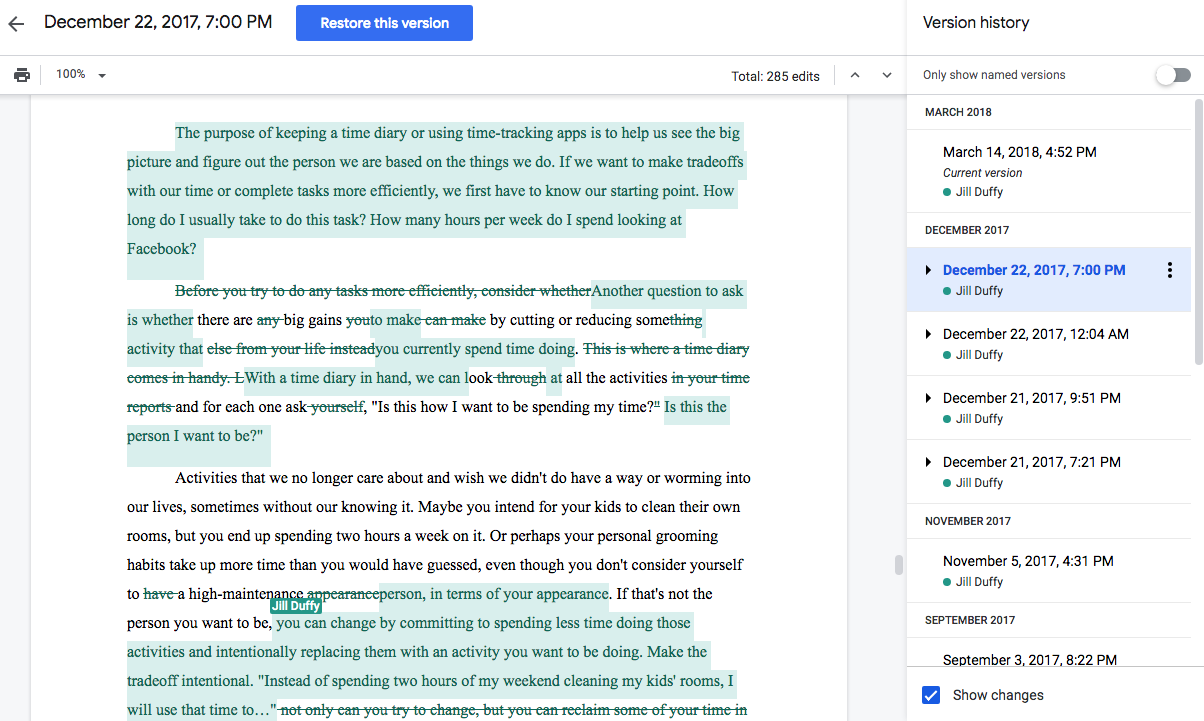
Ok, I know the word repository is confusing, but let me quickly explain the term. Simply put, a repository is a folder with files in it, on which Git does something called version tracking. Meaning it will track all changes that you make to those files. A good example of this sort of tracking is in Google Docs, when you click on Version History and it shows you all the changes made by you and other people to the document (image below).
So, let's create our first repository. 🤩
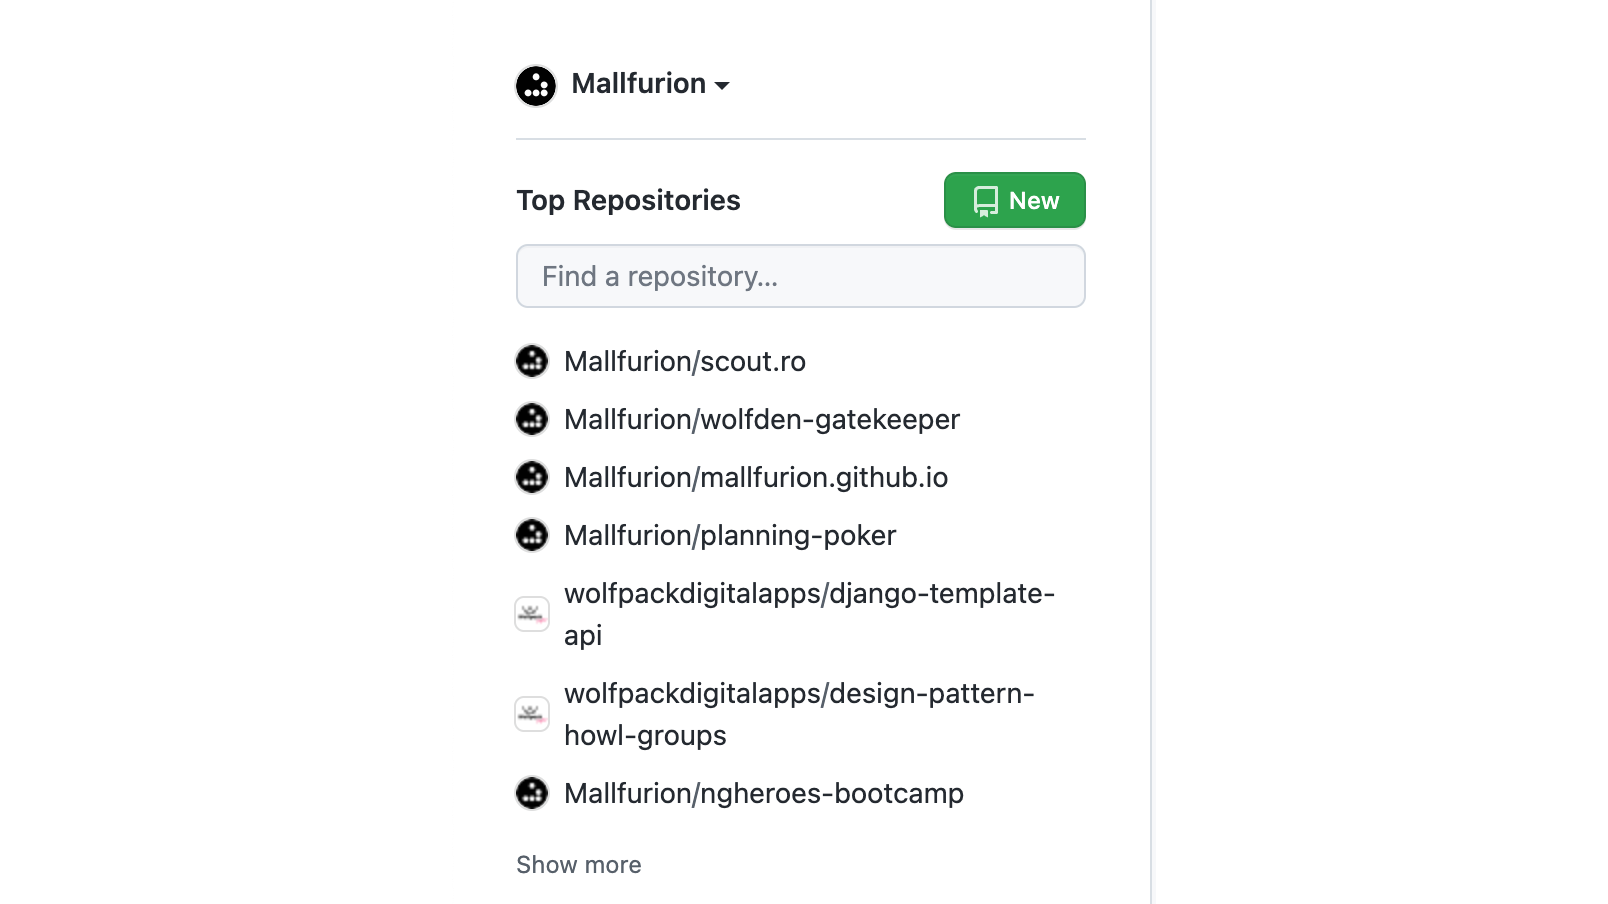
For the first repository, you will need to find a green button called New and click on it. When logged in and on the homepage of github.com, it should be on the left side of the screen. Something like this:
Good, now we need to give it a name, in the Repository name input field. Here is where we need to use your username, in the format of:
<your-username>.github.ioSo, for example, my username is Mallfurion (yea, I know...) so my repository name will be mallfurion.github.io. If your username is gheorghe-hagi, the repository name will be gheorghe-hagi.github.io. Easy peasy, lemon squeezy.
Leave all the other settings as default, and click the green button Create repository.
Let's add some files
On the repository page, there will be an action for creating a new file. Click on that.
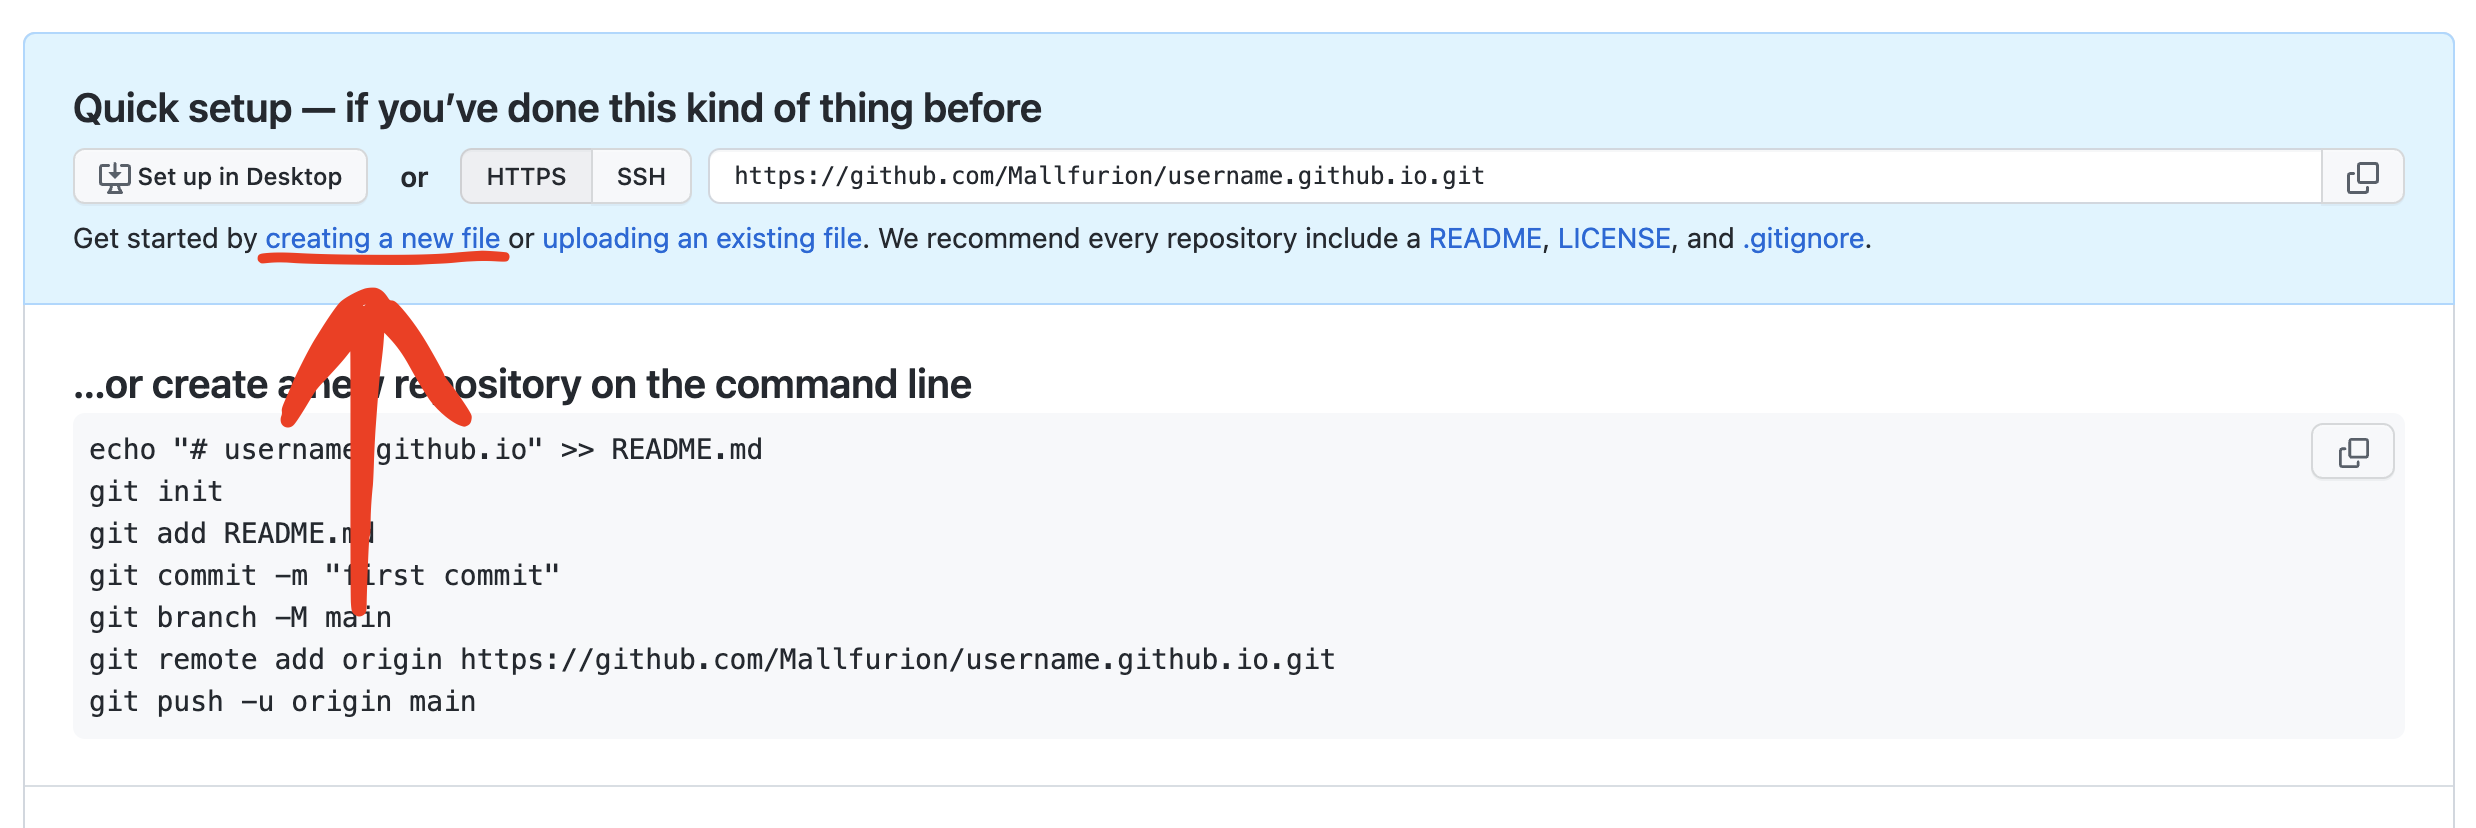
First of all, we will need a configuration file, to let GitHub Pages know some setup details. This first file we will call _config.yml.
For _config.yml, paste the following code and replace the title, author, and description with your own:
theme: minima

title: Your website title
author: Gheorghe Hagi
description: Professional footballer, retired

header_pages:
  - index.md
When done, click the green button Commit Changes ...
Getting familiar with Markdown
Ok, so now we need to do a bit of learning. Don't worry, I won't insist too much, you can get familiar with all of the Markdown syntax later. You might be wondering, "WTF is Markdown?"
Simply put, it's a markup language that allows you to write formatted text in plain text. Here you can find a very helpful cheat sheet, but for what is worth, here is a quick intro.
# This will render to a Heading 1
## This to a Heading 2
### This to a Heading 3, and so on
*this is italic*
**this is bold**
~~this is strikethrough~~
[This is a link](https://florin.me)

Here we have some `inline code`.
```
This is a block of code.
```
After this line, we will have a horizontal line.
---Creating our index page
After we added the _config.yml, we should be on the homepage of the repo (that's short for repository). At the top, we should see a dropdown button called Add file ▼, click it, and select ➕ Create new file.
Let's name it index.md, and add some information to it:
---
title: Home
description: welcome to my website
---

## Hello there, beautiful people!

Lorem ipsum dolor sit amet, consectetur adipiscing elit.
Proin et dui turpis.
Quisque dui velit, condimentum eget commodo eu, posuere ut tortor.
Fusce vulputate est a condimentum semper.
Integer ex ex, suscipit at elit at, mollis pulvinar nunc.

---

## My name is Gheorghe Hagi

Mauris fringilla odio tristique, consectetur est vel, laoreet tellus.
Suspendisse at nibh id lacus lacinia rutrum.
Nulla pharetra mi massa, vel egestas tellus auctor sit amet.
Aliquam sit amet massa interdum est rutrum rutrum.
Donec a diam a lorem commodo auctor.
You can replace the placeholder text with a cool description about you! 🤪
Finally, let's set up GitHub Pages
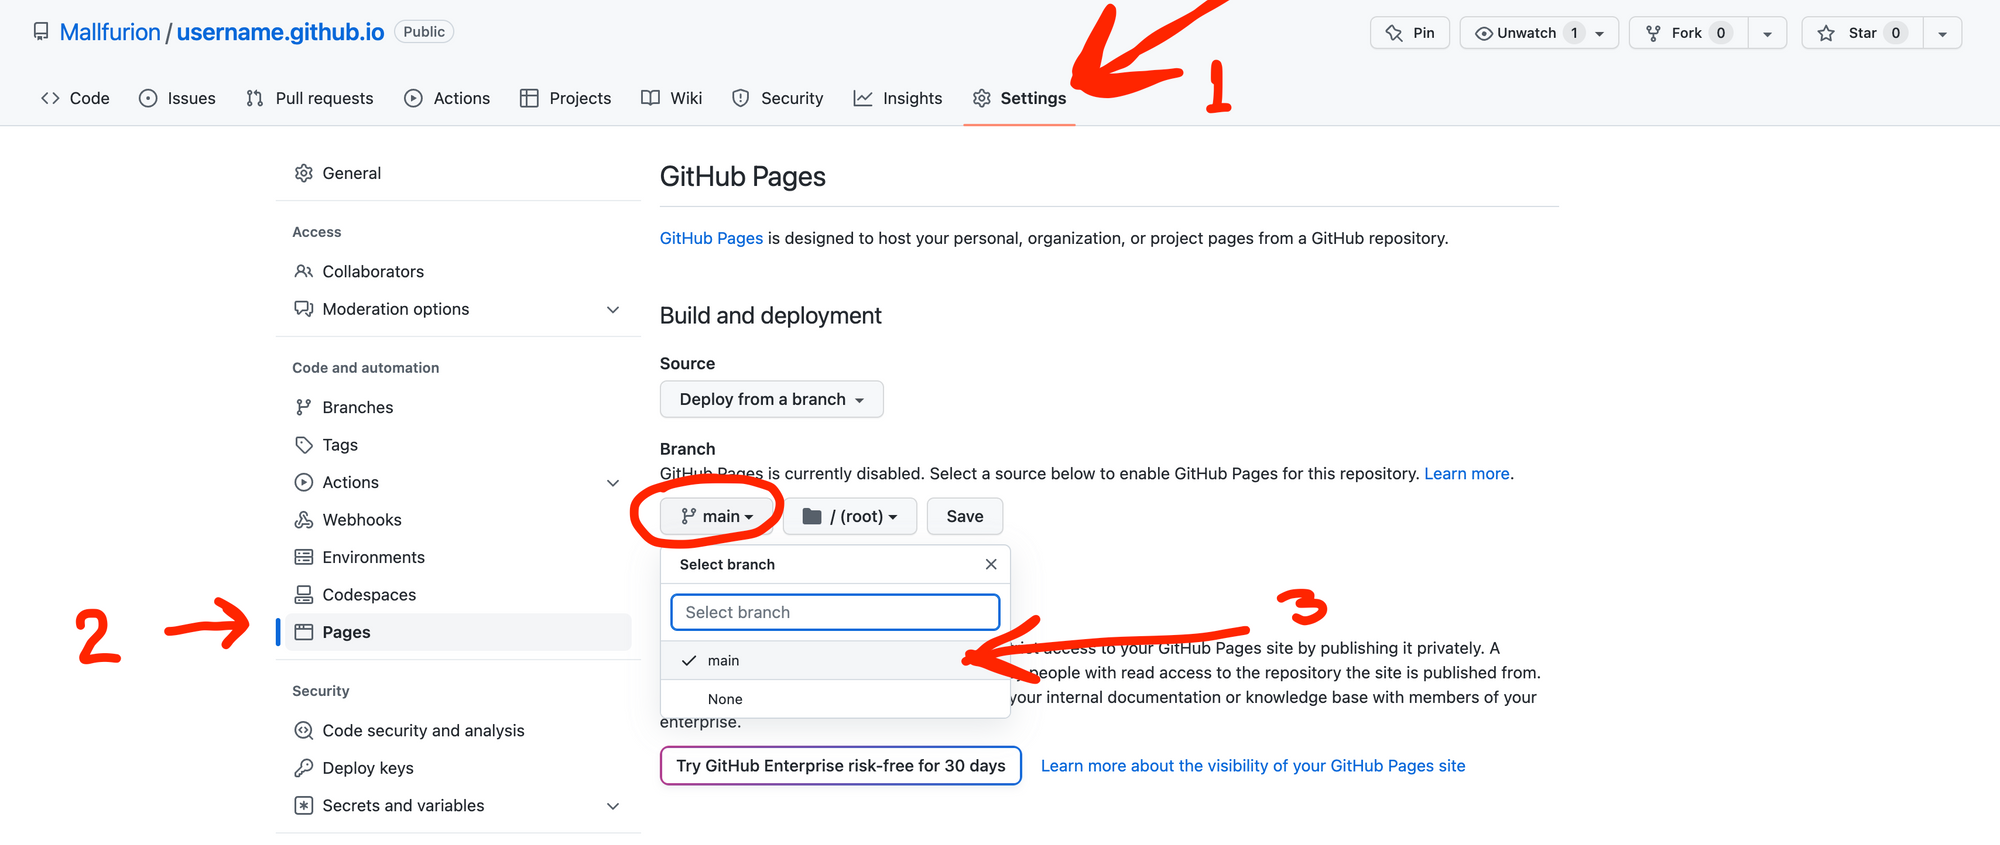
This is the final step, I promise. We need to go to Settings, click on Pages in the left menu, and select a Branch from which to deploy. For our use case, that will be the main branch.
And off it goes to the Internets
The GitHub Pages will build your website, and you can see the progress of that under the Actions tab of your repository. It usually takes about a minute. To easily access your GitHub Pages URL, let's add it to the repo's description.
Inside the main page of the repo, click the cog wheel ⚙️ near About, on the right, and check the box for ✅ Use your GitHub Pages website. Press Save Changes.
Now if you click the URL that appears under the description, you should be able to see your new webpage! Congratulations, you did it! 🥳 🎉 🎊
Advanced: Add pages, images, and styles to your website
I couldn't leave you with only one page full of text, now could I?
To add images, you will create an assets folder, then an images folder, and add your images there. When adding files in the GitHub interface, in order to add folders, you will provide a slash after the name of the folder, to create that particular path. So in our case, in order to to create that particular path, we will type in:
assets/images/.gitkeepThat .gitkeep is just an empty file so that GitHub can create the folder structure. You can delete it after you upload an image, if you want to. To upload an image, select from the Add file ▼ dropdown the ⇪ Upload files option, then choose the image file you want to upload.
Inside the .md pages, you can reference an image like this:
The same thing can be done for documents, PDFs for example:
[Download PDF](/assets/docs/cv.pdf)Links are added this way:
[GitHub](https://github.com/Mallfurion)To add more pages, a good idea is to structure them under a folder, called pages. You can also add them to the root of the project, but we are not savages, are we?!
Finally, we can add some styling to our webpage. To do that, we will create a file called main.scss under the assets folder. It has to start with the two lines at the top and the minima import:
---
---

body {
  margin: auto;
}

@import "minima";

hr {
  margin: 3rem 0;
}

h2 {
  font-weight: bold;
  margin-bottom: 2rem;
}
Don't forget to commit the files, and you are golden. Images, styles, and a whole lot of HTML magic can happen on your website. The sky is the limit!
My GitHub Pages website
If you are stuck on any step or want to have a visual representation of the repository, you can check my GitHub repository.

Bonus: Creating your CV
Also, I wanted to share a cool app that allows you to create and save your CV easily, I've been using it for quite some time and it helped me a lot in keeping my CV up to date. Give it a check over here. You submit your data to the various categories and can download it as PDF and JSON (JSON just in case the app will disappear in the future, you can have your data saved 😜).
I do hope that this was helpful for some of you, and if you got to this part, I want to thank you for the read.
If you will implement a GitHub Pages of your own, please let me know with a comment.
Good luck and keep on coding! ❤️
